Introduction
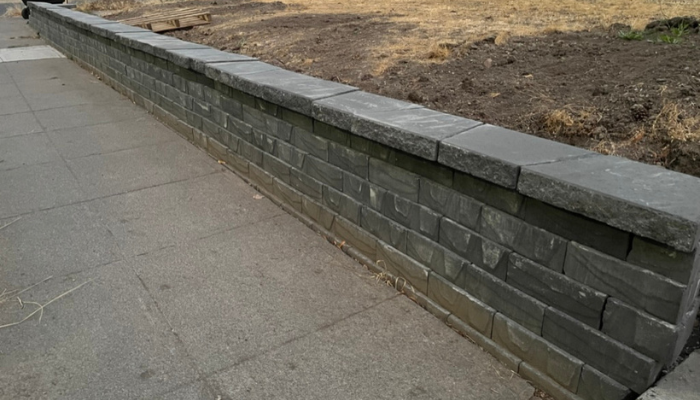
Building a retaining wall is an excellent way to add both functionality and aesthetic appeal to your outdoor space. These structures are essential for preventing soil erosion, managing water runoff, and creating level areas in sloped landscapes. For me, the motivation to build a retaining wall came from a desire to transform the bottom of my sloped grass area into a functional garden. Removing the slope not only makes mowing the lawn easier but also adds extra depth and beauty to my yard.
In this guide, I'll walk you through the entire process of building a retaining wall, from planning and preparation to construction and maintenance. I'll share my mistakes and challenges along the way, giving you the advantage of learning from my experience. Whether you're a seasoned DIY enthusiast or a beginner looking for a new project, this guide will provide you with the knowledge and confidence to get started on your own retaining wall.
Planning Your Retaining Wall
Before you start building your retaining wall, thorough planning is essential to ensure a successful project. Begin by assessing the need for the wall: Are you looking to prevent soil erosion, manage water runoff, or create a level garden area? Knowing the purpose will help guide your decisions.
Next, choose the right materials for your wall. Common options include stone, concrete blocks, and timber, each with its own aesthetic and structural benefits. Consider the style of your home and garden when making your selection.
Understanding local building codes and permits is crucial. Check with your local authorities to find out if you need any permits or if there are specific regulations you must follow. This step can save you time and potential legal issues later on.
Finally, determine the size and location of your wall. Measure the area carefully and design a wall that suits your landscape. A well-planned retaining wall not only serves its functional purpose but also enhances the overall look of your garden.
Gathering Materials and Tools
Gathering the right materials and tools is crucial for the successful construction of your retaining wall. Here’s a detailed checklist to ensure you have everything you need before you start your project.
Materials Needed for Building a Retaining Wall
- Retaining Wall Blocks: Choose durable, weather-resistant blocks that suit your aesthetic preferences. Concrete blocks, natural stones, and timber are popular choices.
- Gravel: Essential for creating a stable base and ensuring proper drainage. Look for coarse, angular gravel.
- Sand: Used to level the base layer of blocks.
- Backfill Material: Typically, gravel or crushed stone to support the wall and facilitate drainage.
- Adhesive or Connectors: Ensure the blocks stay in place, especially if you're building a taller wall.
- Drainage Pipe: Prevents water from building up behind the wall and causing damage.
Tools Needed for Building a Retaining Wall
- Shovel: For digging and moving materials.
- Level: Ensures each layer of blocks is perfectly horizontal.
- Tape Measure: For accurate measurements and layout planning.
- Tamper or Plate Compactor: Compacts the soil and gravel base, creating a solid foundation.
- Chisel and Hammer: For cutting and shaping blocks to fit.
- Gloves and Safety Glasses: Protect your hands and eyes while working.
Safety Gear Recommendations
- Work Gloves: Protect your hands from rough materials and sharp edges.
- Safety Glasses: Shield your eyes from dust and debris.
- Dust Mask: Prevent inhalation of fine particles while cutting or handling materials.
- Steel-Toe Boots: Provide foot protection from heavy blocks and tools.
Having the right materials and tools on hand will make the construction process smoother and more efficient. By being well-prepared, you’ll minimize delays and ensure your retaining wall is built to last.
Remember, proper planning and preparation are key to a successful DIY project. Now that you have everything you need, you're ready to move on to the next step: preparing the site.
Preparing the Site
Preparing the site for your retaining wall is a crucial step that sets the foundation for a successful build. Here’s how to effectively prepare your area:
Marking the Layout
Start by marking the layout of your retaining wall using stakes and string. This will help you visualize the wall’s placement and ensure it’s straight and aligned. Use a level line to maintain consistent height throughout the construction.
Excavating the Area
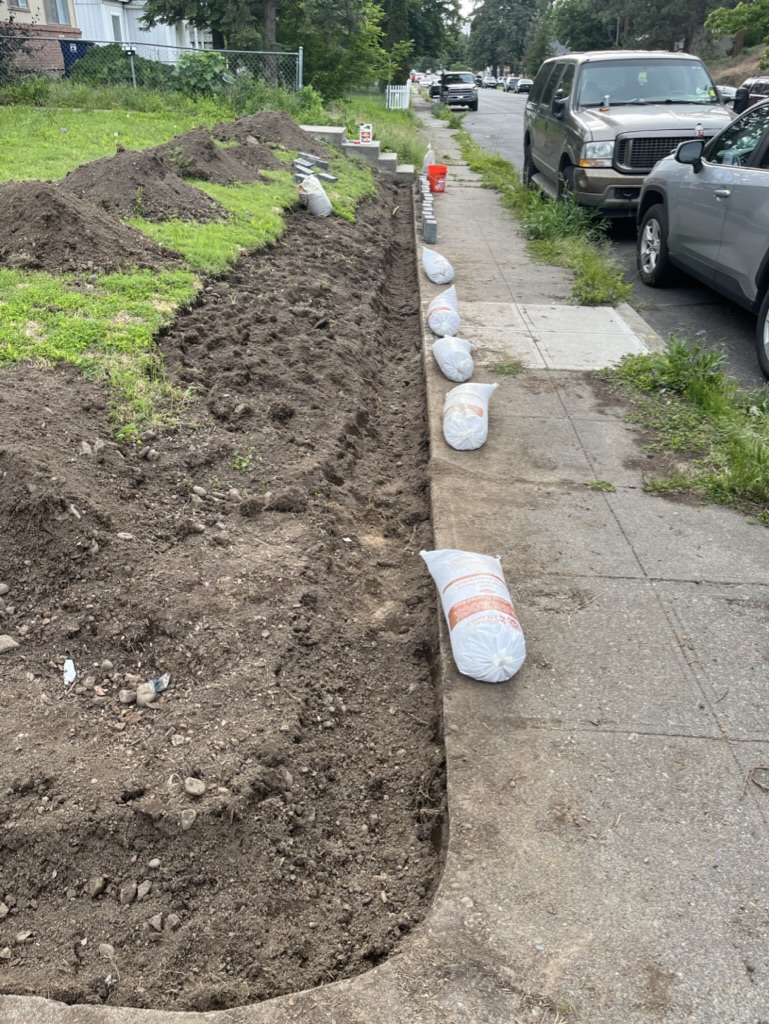
Once the layout is marked, excavate the area to create a stable foundation. Remove any grass, weeds, and loose soil within the marked zone. Dig down to a depth of at least 6 to 12 inches, depending on the height of your wall, to provide a solid base.
Excavating can be a challenging task, often requiring significant physical effort. Digging with a shovel can be exhausting, especially when dealing with rocky soil. In my yard, the soil is packed with large river rocks that are heavy and difficult to remove. I even encountered a boulder that was too massive to take out, which led to some headaches and adjustments in my plans. As a result, I had to dig deeper to lay my bricks at a different height, allowing me to bridge over the boulder and successfully complete my wall.
Creating a Solid Base
After excavation, lay down a layer of gravel to create a stable base for your wall. Aim for about 4 to 6 inches of compacted gravel, which will help with drainage and prevent settling. Use a tamper or plate compactor to pack the gravel firmly.
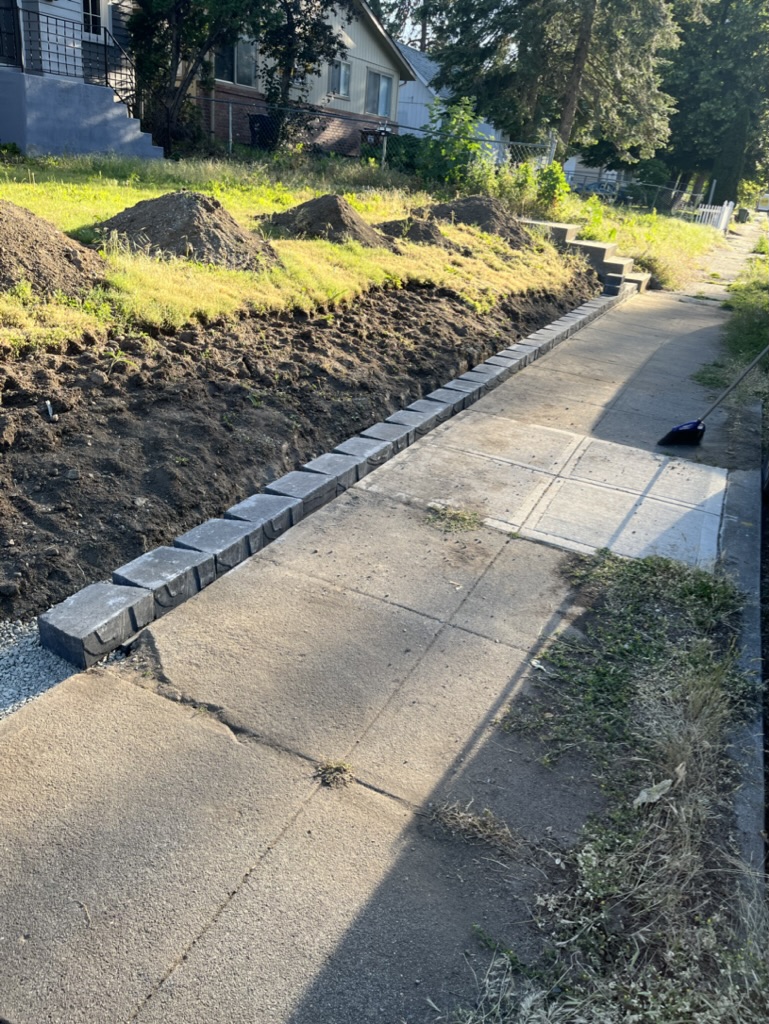
Make sure to dig deep enough the first time. In my initial attempt, I dug only about 2 inches and thought it was "good enough." I laid down the gravel and sand for leveling and even completed an entire 50-foot row of bricks. However, after taking a break for about a week, I returned to find that ants had taken all my sand and built ant hills around the sidewalk. Because of this, I had to move all the bricks and dig up the sand and gravel I had previously laid to dig deeper. The ants' interference made it clear that my base wasn't deep enough, and my wall was already unlevel. Redoing it with the proper depth made it much more stable.
Ensuring Proper Drainage
drainage is vital to the longevity of your retaining wall. Consider installing a drainage pipe at the base to direct water away from the wall and prevent pressure buildup. Backfill with gravel behind the wall to facilitate drainage and reduce the risk of erosion.
I installed a drainage pipe along the backside of the wall, leaving a small gap at the base for the hose to exit, allowing excess water to drain. I elevated one side of the hose significantly higher than the exit end so that any collected water would flow to the far end and escape without eroding the wall.
Building the Base
Constructing a solid and level base is essential for the stability and longevity of your retaining wall. Here are the key steps to building a strong foundation:
Laying the First Row of Blocks
Start by laying the first row of blocks directly on the compacted gravel base. This row is the most crucial because it sets the foundation for the entire wall. Ensure each block is level and properly aligned. Use a rubber mallet to adjust the blocks as needed, and check for level frequently with a spirit level.
Staggering the Blocks
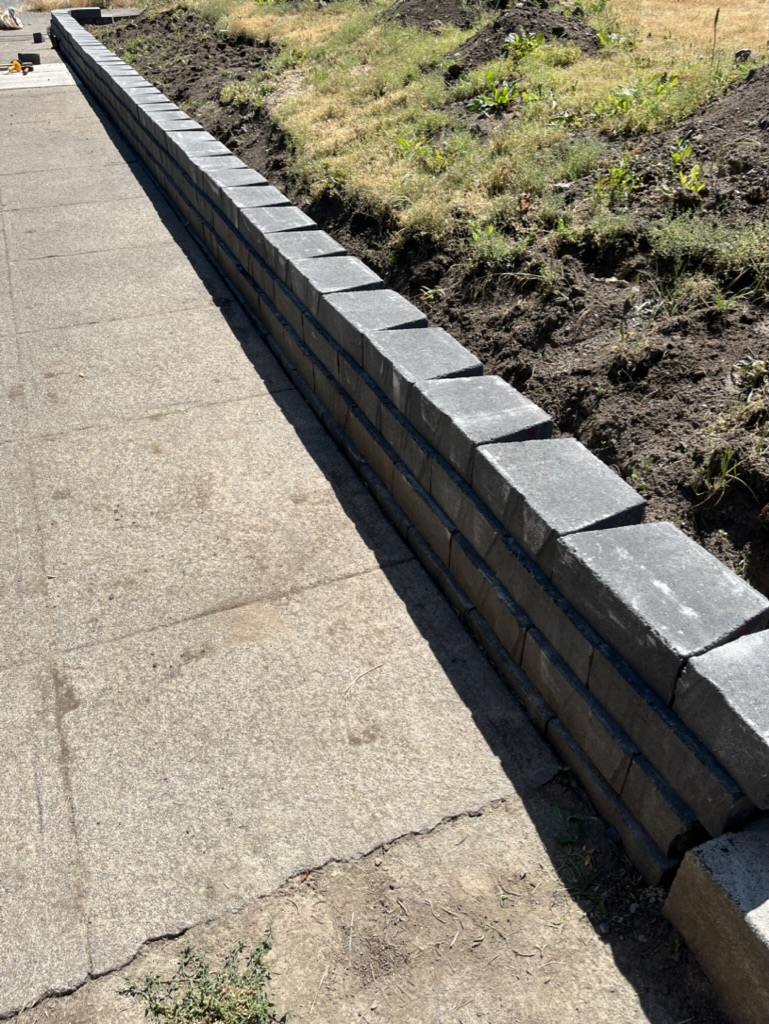
For added strength and stability, stagger the blocks in each subsequent row. This means that the vertical seams between the blocks in one row should not line up with the seams in the row directly below it. Staggering the blocks helps distribute the weight more evenly and reduces the risk of the wall shifting over time.
Adding Backfill Material
As you build each row, backfill the space behind the wall with gravel or crushed stone. This backfill provides additional support and ensures proper drainage. Use a tamper to compact the backfill material after every few rows to maintain stability.
Checking for Level and Alignment
Throughout the construction process, continually check that each row of blocks is level and properly aligned. Small adjustments can be made with a rubber mallet or by adding or removing a bit of gravel under the blocks. Taking the time to ensure precision at each step will result in a more professional and durable finished wall.
Constructing the Wall
Now that you have a solid base, it’s time to build up your retaining wall. Follow these steps to construct a sturdy and attractive wall:
Staggering the Blocks
For added strength and stability, stagger the blocks in each subsequent row. This means that the vertical seams between the blocks in one row should not line up with the seams in the row directly below it. Staggering the blocks helps distribute the weight more evenly and reduces the risk of the wall shifting over time.
Cutting and Fitting Blocks
You may need to cut some blocks to fit around curves or to finish the ends of rows. Use a masonry saw or chisel and hammer to make clean cuts. Wear safety goggles and gloves while cutting to protect yourself from flying debris.
Paver chisels are affordable and readily available at your local hardware store. For detailed instructions on cutting pavers, be sure to check out our blog post on "How to Cut Pavers."
Using Adhesive or Connectors
For walls over a certain height (typically three feet), it's essential to use construction adhesive or specialized connectors to hold the blocks together. Apply a layer of adhesive between each block layer, especially on the back side where the blocks meet the backfill material. This helps keep the wall intact under pressure and weather conditions.
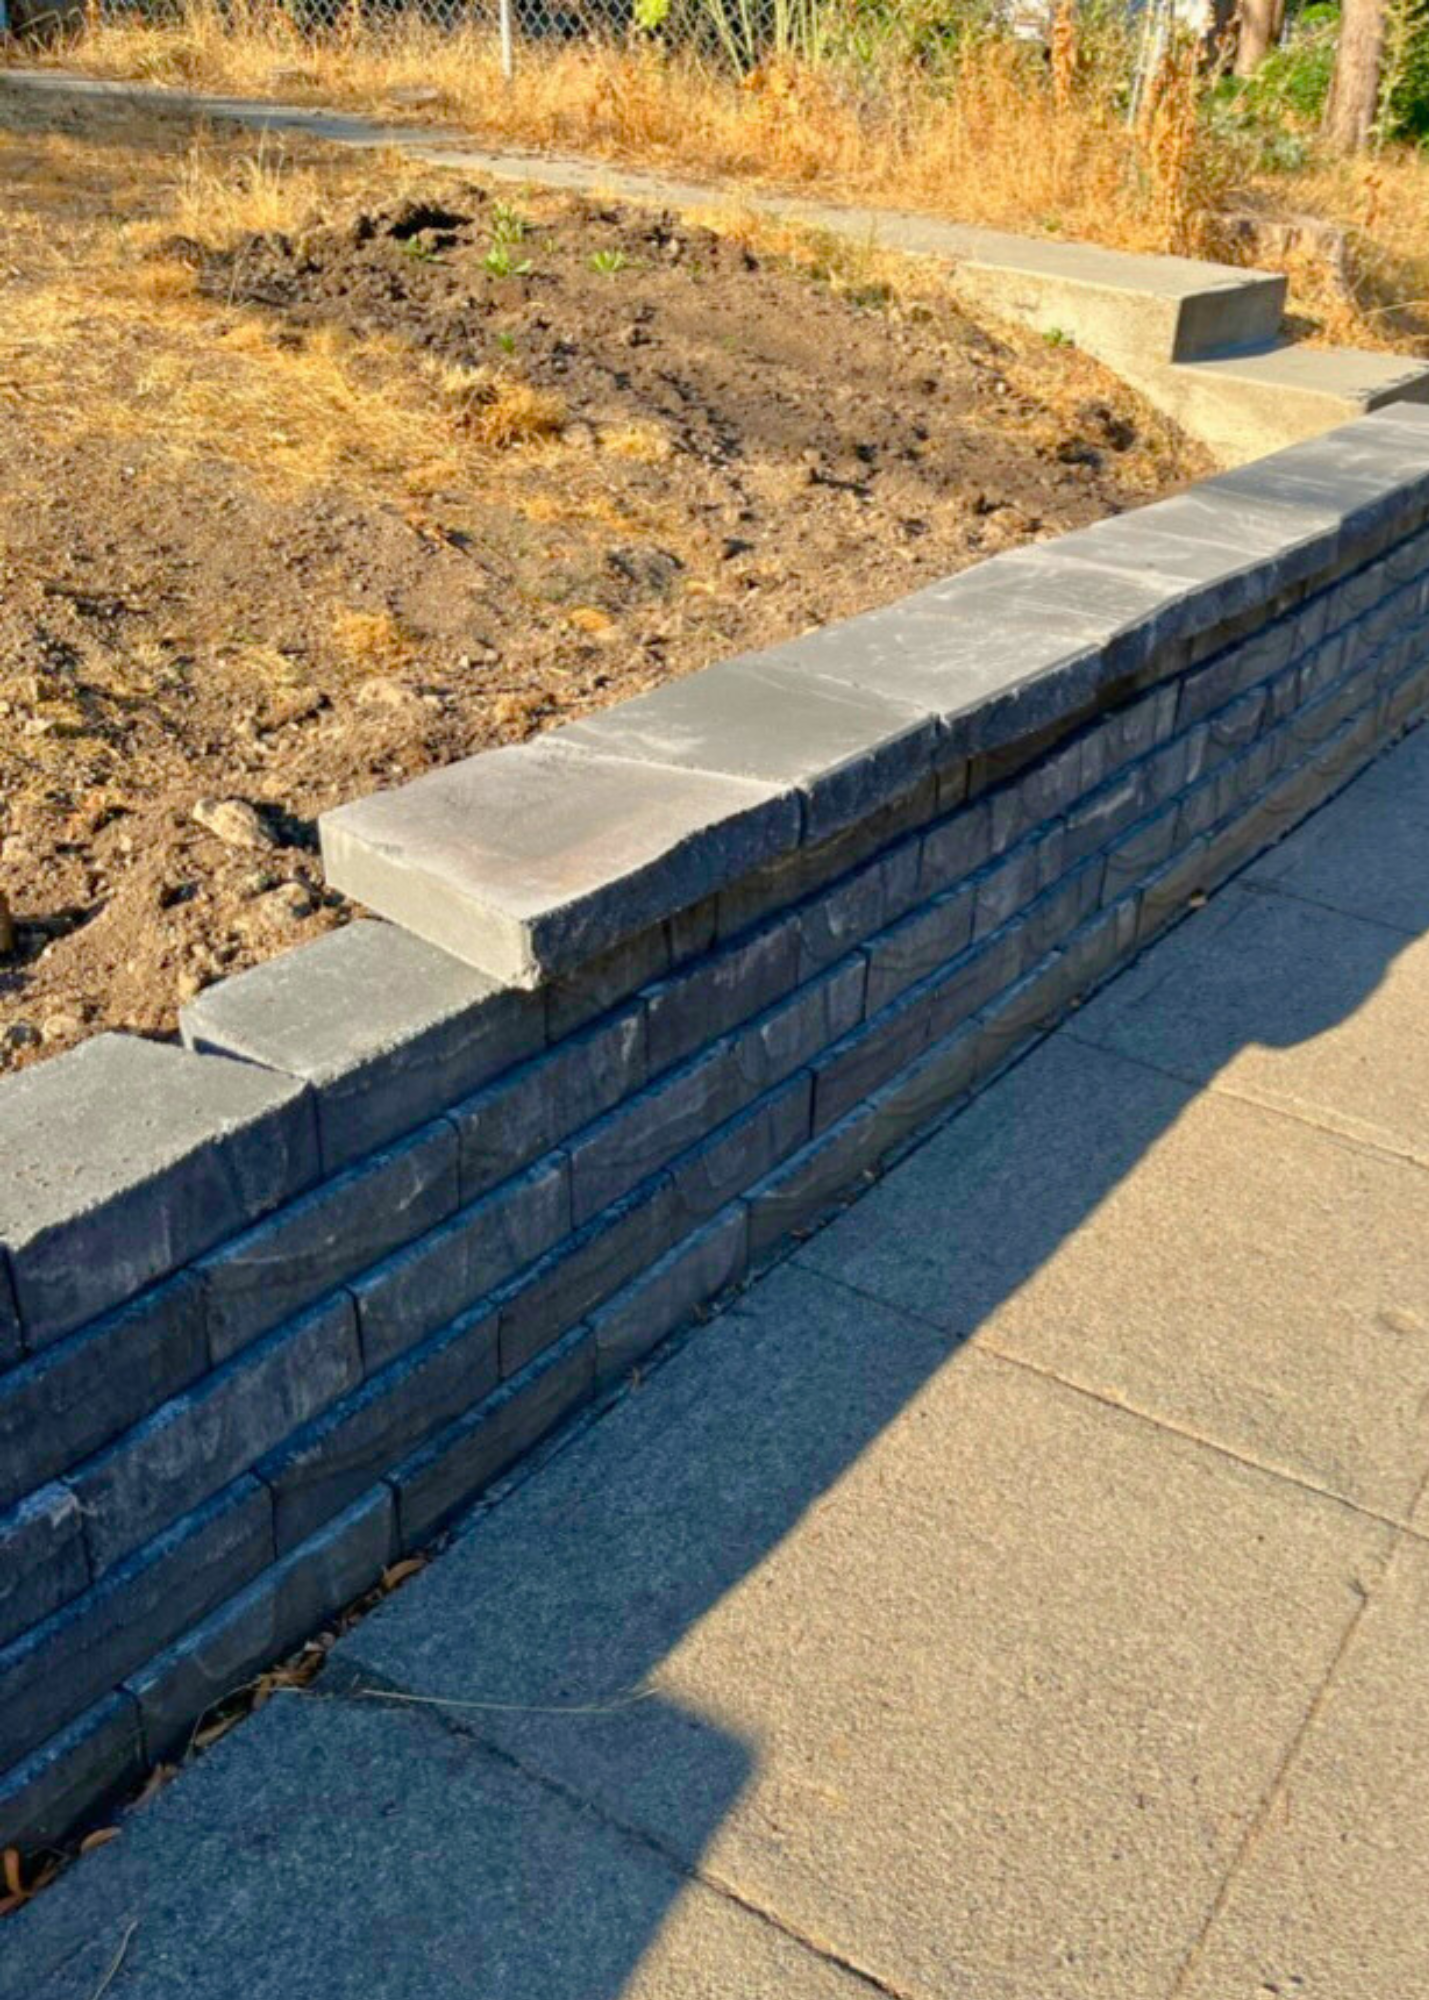
Our wall was just under three feet tall, so I didn't use adhesive between each layer. However, the capstones were of a different shape and size, making them less sturdy. I applied a generous amount of adhesive to each capstone, which made a significant difference. The few capstones that didn't receive enough adhesive are quite wobbly. Securing the capstones was crucial because we've seen many neighborhood children jumping and running along the wall.
Building to the Desired Height
Continue adding rows of blocks, backfilling, and checking for level until you reach your desired wall height. Remember that the stability of the wall decreases as it gets taller, so for walls over four feet, consider consulting a professional or adding additional reinforcement.
Adding Capstones
Once the wall has reached its intended height, finish it with capstones for a polished look. Capstones are usually larger and flatter than regular blocks, providing a neat finish and extra stability. Apply a layer of construction adhesive to the top row of blocks before placing the capstones.
By carefully constructing the wall layer by layer, you’ll ensure that it is both strong and visually appealing. With your wall built up to its final height and capped off, you’re ready to move on to the finishing touches and maintenance tips.
Finishing Touches
With the main structure of your retaining wall in place, it’s time to add the finishing touches to ensure durability and enhance its appearance. Here are some steps to complete your project:
Landscaping Around the Wall
Enhance the beauty of your retaining wall by landscaping the area around it. Planting flowers, shrubs, or ground cover can soften the look of the wall and integrate it seamlessly into your garden. Consider using plants that thrive in your local climate and soil conditions.
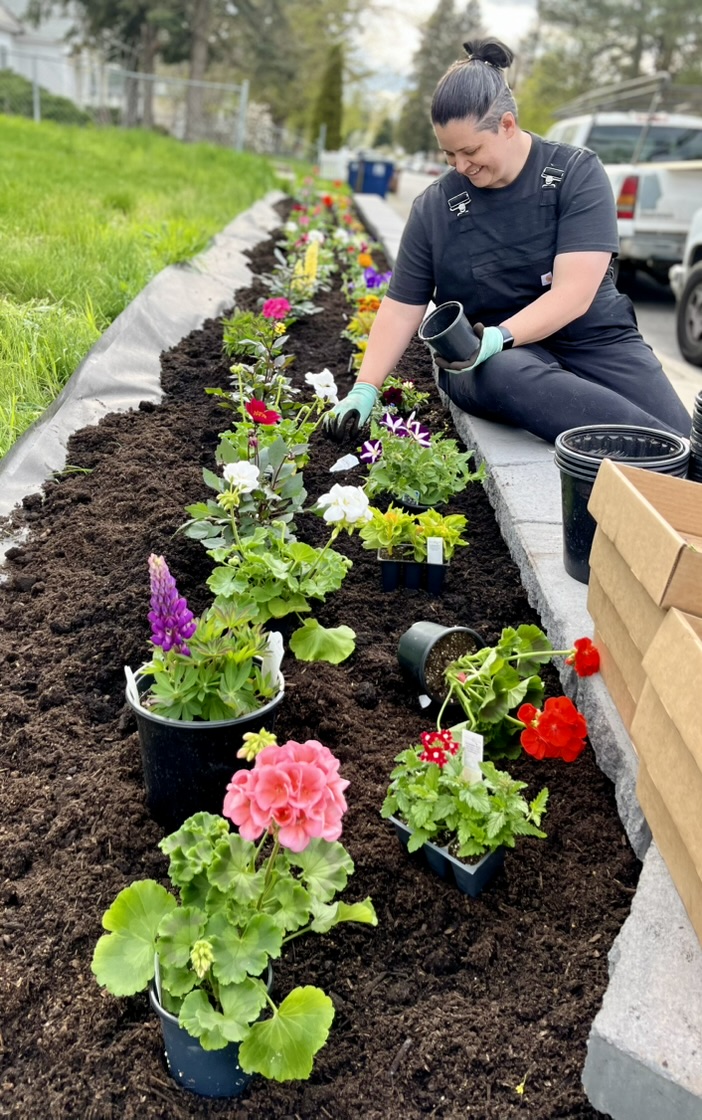
For our wall, I filled the remaining space with soil. It took much more soil than I anticipated, so make sure to calculate your needs before heading to the store. Once filled, I planted a variety of flowers along the entire wall. These vibrant blooms have become the highlight of our yard, contrasting beautifully with the stone wall to create a rugged yet welcoming look. To help pick out the flowers I planted, I went to my local nursery. And to help learn to care for my flowers, I visited Petal and Spade.
Incorporating Lighting
Outdoor lighting can add both functionality and aesthetics to your retaining wall. Install solar-powered or low-voltage lights along the top or base of the wall to illuminate your garden at night. This not only highlights the wall’s design but also improves safety.
Mulching and Soil Stabilization
Apply mulch to the top of the backfilled area behind the wall to help retain moisture and prevent erosion. Mulch also adds a neat and finished look to your garden. If you’re planting on the slope above the wall, consider using erosion control fabric to stabilize the soil and prevent it from washing away.
Inspecting and Adjusting
After completing the wall and adding the finishing touches, inspect the entire structure for any potential issues. Check for gaps, misaligned blocks, or areas where the wall might not be level. Make any necessary adjustments to ensure the wall is stable and secure.
Regular Maintenance
Maintaining your retaining wall is crucial for its longevity. Regularly check for signs of wear, such as cracks, bulging, or shifting blocks. Address any problems promptly to prevent further damage. Keep the drainage system clear of debris to ensure proper water flow and avoid pressure buildup behind the wall.
By adding these finishing touches and committing to regular maintenance, your retaining wall will remain a functional and beautiful addition to your garden for years to come. With your project complete, you can enjoy the enhanced landscape and the satisfaction of a job well done.
Up Next:
Budget-Friendly Brilliance: Building a Herringbone Patio with Pavers
Discover how to create a beautiful herringbone patio without breaking the bank!
Continue reading